
Popsicle Stick Desk Organiser
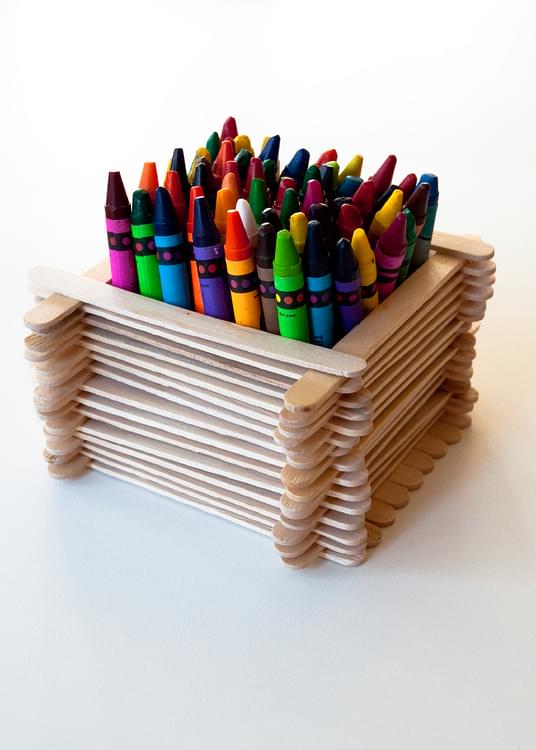
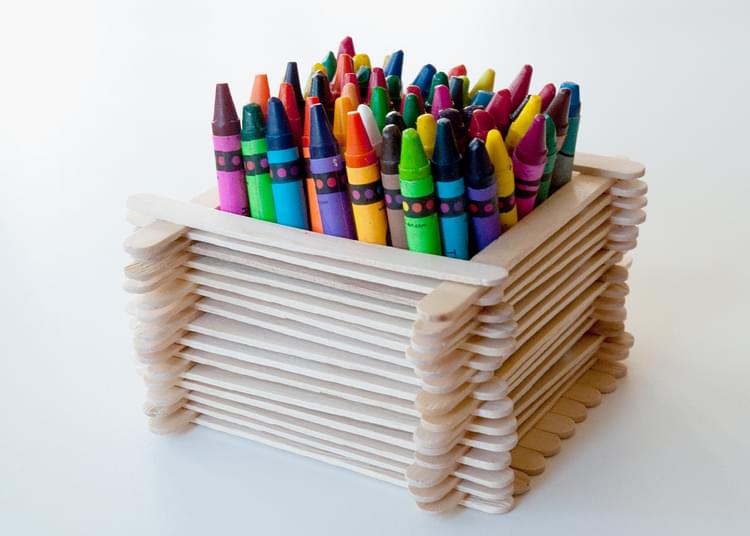
Fed up of having pens, crayons, paintbrushes and pencils all over the place? Want to get organized before the kids go back to school? Why not have them make this popsicle stick desk organizer. This is a great engineering project that is fun to do - and so very useful! Customize the hight to suit your need - a few inches high to hold erasers or clips, 3 or 4 inches to hold crayons, or taller for pencils and pens. You can leave it unpainted, paint the popsicle sticks before you assemble, or paint the finish project. The choice is yours! This would also make a great gift for a teacher, or even for Dad for his Birthday or on Fathers Day.
Project Info
| Difficulty | Easy |
|---|---|
| Duration | Under 15 minutes |
| Age | Any |
| Submitted by | |
| Share |
Materials
- Glue
- Popsicle Sticks
Instructions
- The first step is to create the base of "pot". You are going to do this by laying down popsicle sticks side by side (and perfectly aligned) until you have made a rectangle such that if you were to lay down another popsicle stick at 90 degrees, it would be slightly longer than the rectangle, and overhang (approximately 1 popsicle stick width) on each end.
- You are now going to build the sides of the pot. This will be done by gluing 2 popsicle sticks at right angles to those that you have already laid down, and then continuing to add popsicle sticks 2 at a time, each 2 at right angles to the last until you have built the sides as high as you wish.
- For the first 2 popsicle sticks, place a line of glue along each, and place them at right angles to those already laid. You are going to place each slightly inside the rectangle. Ideally, these popsicle sticks will overhang your rectangle by about 1 popsicle stick width each end, and be approximately 1 popsicle stick width in from the edge.
- You are now going to glue 2 more popsicle sticks onto the pot. These are going to be at right angles to the 2 that you have just placed and will be aligned with the outermost popsicle sticks that you laid on the base.
- Repeat, adding 2 popsicle sticks at a time, each 2 at right angles to the previous 2. Continue until the pot is as high as you wish.
Reviews
✶✶✶✶✶
Not yet reviewed
Useful supplies
- our picks from Amazon for this project:
Related Projects
Project Themes
- Craft Supplies: Popsicle Sticks
- Events and Other Celebrations: Back to School Fathers Day Rainy Day Teacher Appreciation
- By Age: For Elementary / Primary School For Older Kids
- By Gender: For Boys
- Engineering: Engineering
- For ....: For School
- Organizing: Pots